A look at violin notes and finger placement. Two basic concepts that you must understand if you want to get good at playing the violin.

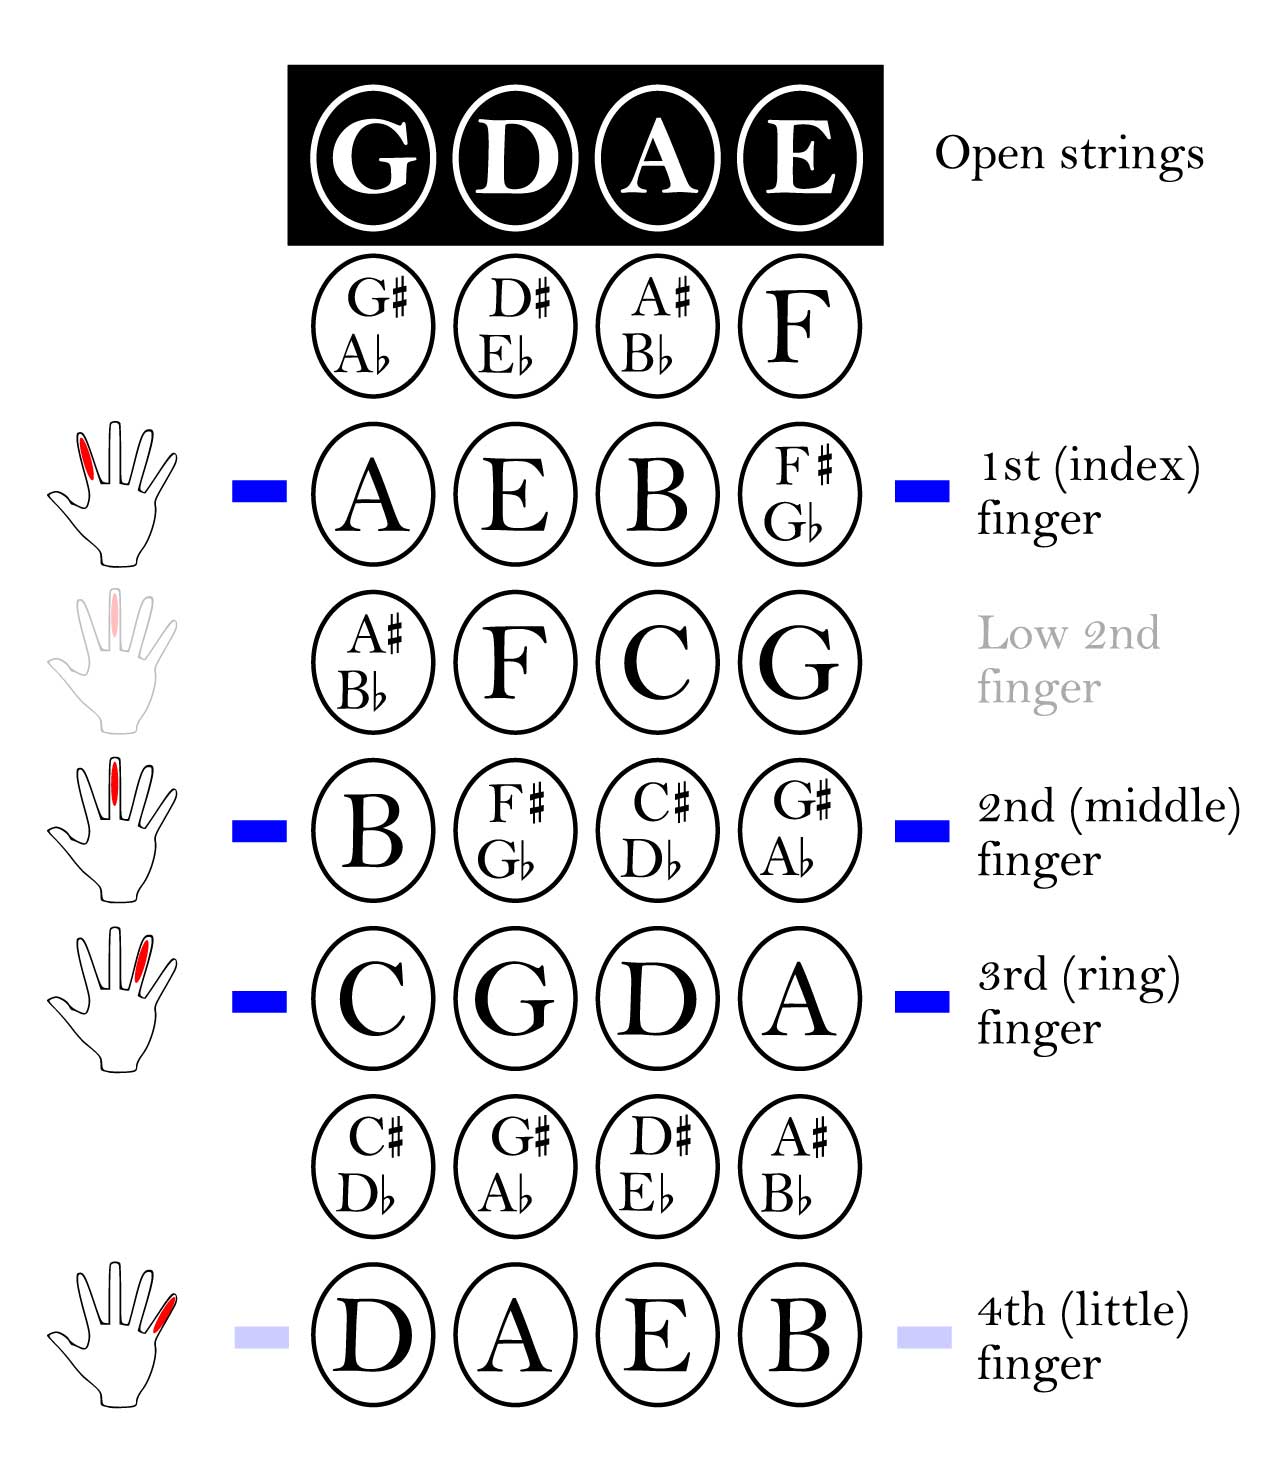
Violin notes and finger placement are two basic concepts that you must understand if you want to get to get any good at playing the violin. You will need to know how to read violin notes and also the position of each of the violin string notes.
Let’s have a look at these basic concepts, shall we?
Where are the Notes on a Violin?
Begin by having references for violin note diagrams (such as the ones in this article) and memorize the position of each note. In this post, we will go through how to use tapes to help you make things easier, but for now, getting the basic note position right is what you should focus on.

Start off by practicing the first position until you get that down pat.
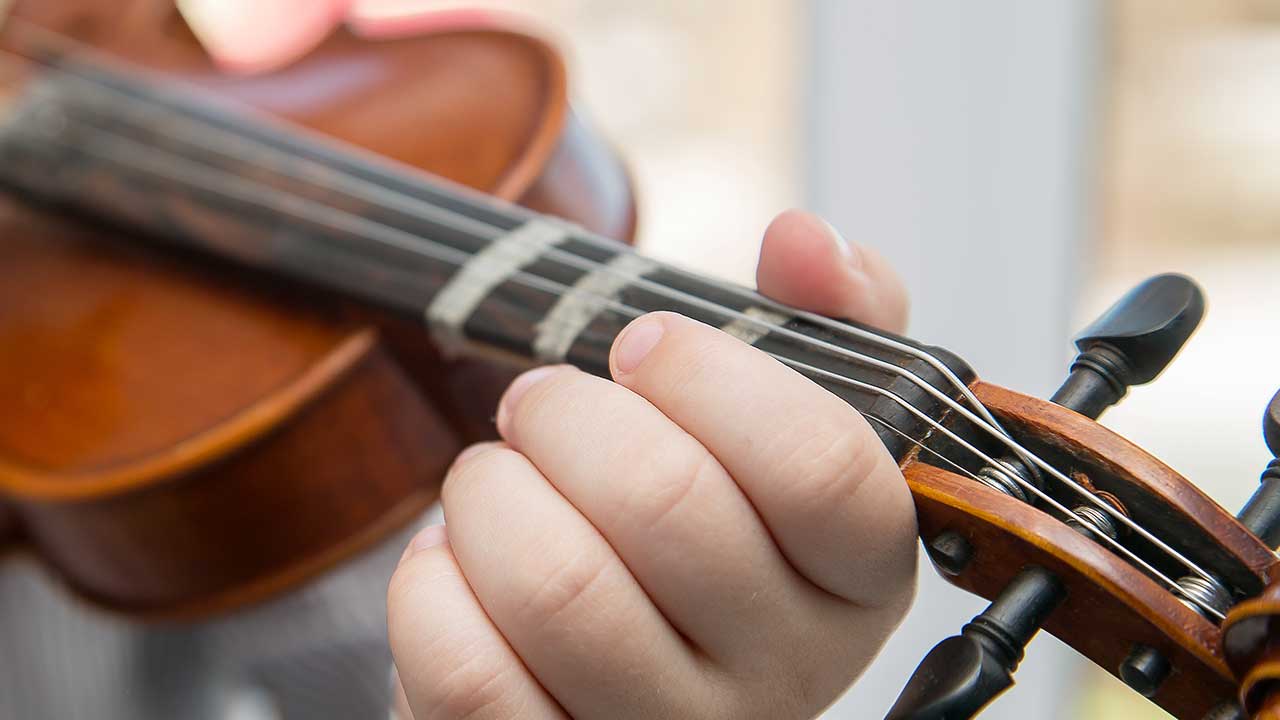
The first position makes use of the lowest five notes on each string. This is trickier than it sounds because getting the position even a little wrong means that the note will not sound quite right. In order to make things easier for you when you are learning, you can place tapes on the violin.
Once you have practiced enough, however, your fingers will instinctively know where to place themselves, and the tapes can be removed. But first, let’s look at Intonation.
What is Intonation?
Intonation is where you place your fingers on the strings. This finger placement affects the pitch of the notes that you play – that is, whether they have a higher pitch, or a lower one. Intonation is extremely important because it affects how good the piece will end up sounding.

Just like when you are playing the piano, you will deal with half-steps and full-steps. If a note is marked with a #, it means that it is sharp, i.e., one half-step higher than the normal note would be.
When a note is marked with a ♭, it means that it is flat, i.e., one half-step lower than the normal note would be.
As you are studying to play the violin, you should have found yourself some violin fingering charts. Memorize these before you start to play so that you know all the violin finger positions. That way, when it comes to playing, you will know where to put your fingers and get the intonation right from day one.
Using Finger Tapes
Start out by ensuring that your violin has been properly tuned. There are smartphone apps or specialized devices that you can use to help with this. Check and check again before you put the tapes on or you might end up with the wrong notes without realizing it.

Now, starting at the top fingerboard on the G string, move to a spot around two inches along the string and then pluck it. Check the tuner to make sure that the note reads as A on the tuner.
Now take a pencil and mark the spot. Then put a three-inch tape strip in position along the spot but under the strings. Make sure that it adheres firmly to the violin.
Check the Index Finger
Now hold your index finger down on the tape and proceed to pluck each of the strings individually. Check the tuner to make sure that the tuner shows an A. If so, you can leave the tape where it is, if not, you may need to adjust its position. This process will be followed for every tape you place.
The Second Finger
Start this one about an inch from where you put the first piece of tape. Follow the same process as above. This time, the G string should show up as B on your tuner.
Your Ring Finger
This is up to a maximum of a half an inch from where you place the second piece of tape. The G string should show up as C on your tuner.
The Pinky
This one is around an inch from where you put the third piece of tape, and you should move it along the string until your tuner shows D.

Violin Notes and Finger Placement
Now you have a basic understanding of violin notes and finger placement; you have somewhere to start. It is tempting to try and practice different positions all at once, but you will progress a lot better if you stick to the first position while you are still learning.
This gives you a chance to perfect your technique without having to worry about changing finger positions too much.
From then on, all you need to do is to practice every day until your fingers fly over the fingerboard without you needing to think about it.

Charles H Barrett
How does one play some of the 3 octave scales on a violin. I can do G major every easily. I can do A major, a little more difficult. I don’t see how I can do a C or a D major scale 3 octaves without totally moving my whole left hand.
New Violinist
Hi Charles, a good method is to learn a scale pattern that works entirely on the board. That is, it does not rely on open strings for notes. This way you can simply move to any root position.